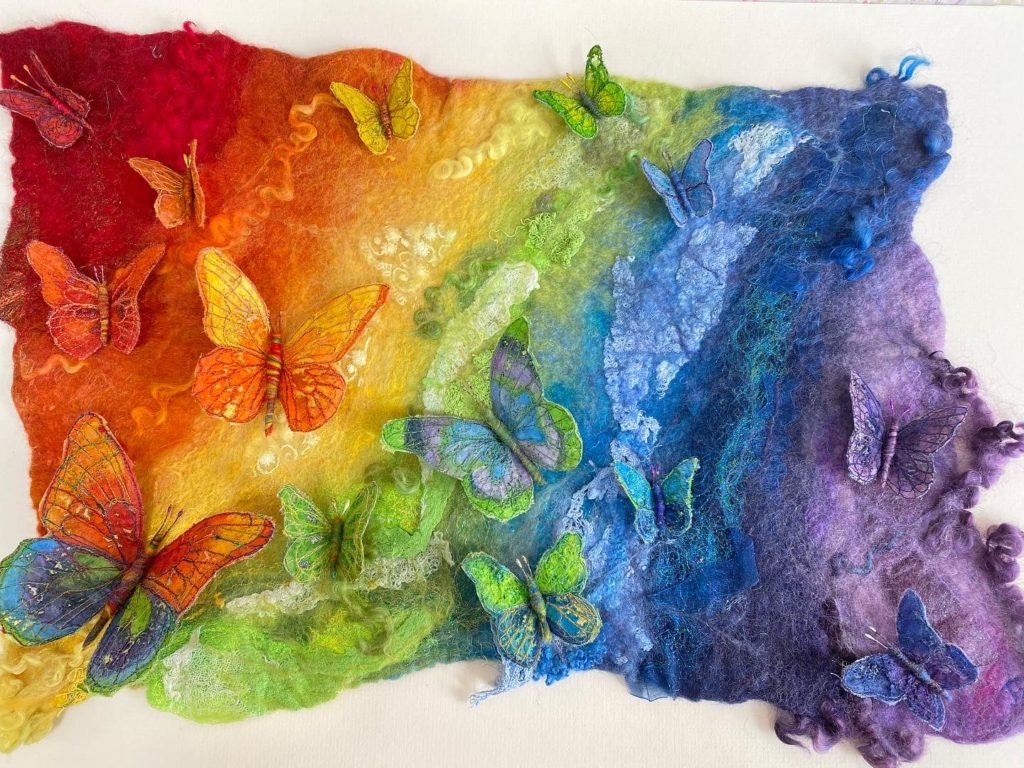
I shared this rainbows and butterflies textile piece on Social Media. I made it in response to all the rainbows being shared during lockdown for Corona Virus. I was asked (and offered) to share my processes for using Lutradur for those who use Free motion Machine embroidery so I thought I’d have a go at a Lutradur Tutorial!
lutradur
Lutradur is a manmade fabric that you can sew, paint and melt holes into! It comes in different weights – light, meduim and heavy. I mostly use medium and heavy and I buy it online from Colourcraft and ArtVanGo (I have no affiliation with them – its just where I have found it available!). Stitching lutradur gives it structure when you melt holes in to it. it shrinks too so experiment with size. if you stitch a shape it will retain that shape when you apply heat.
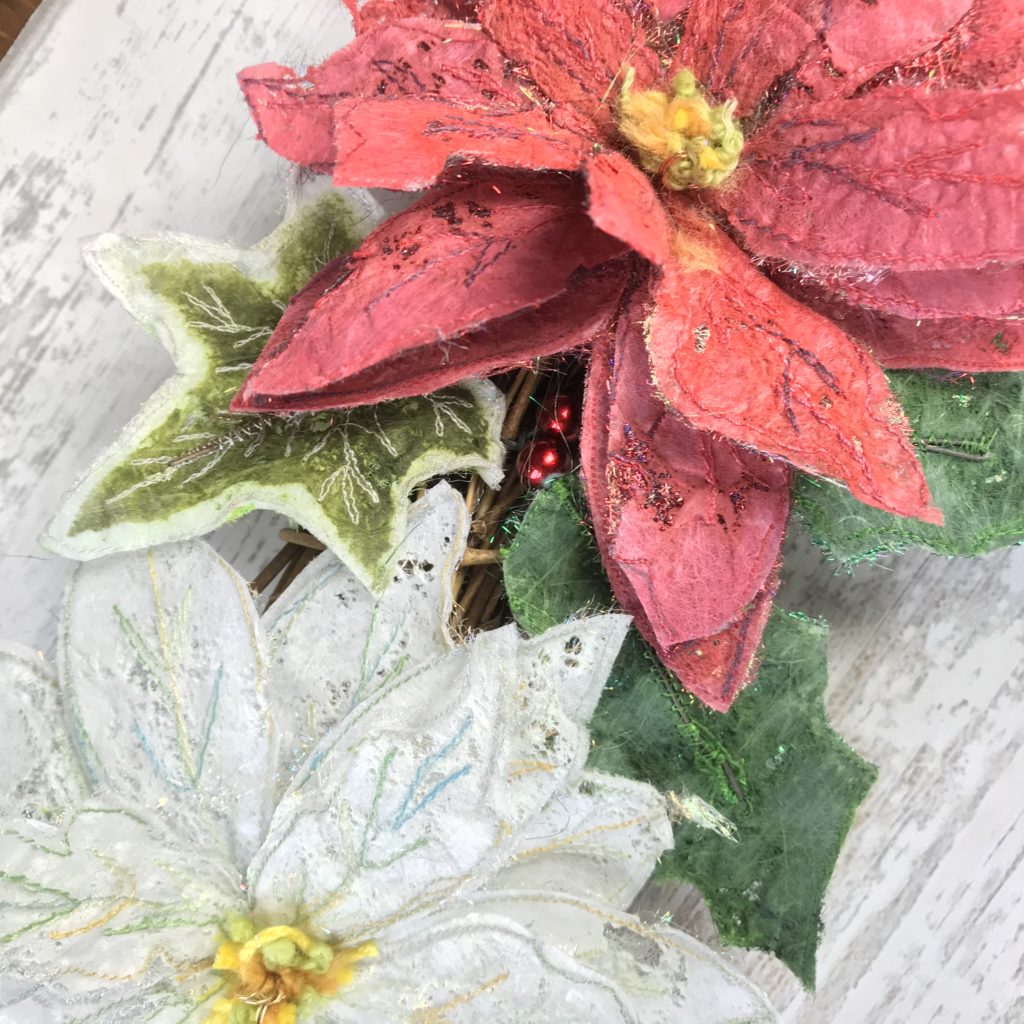
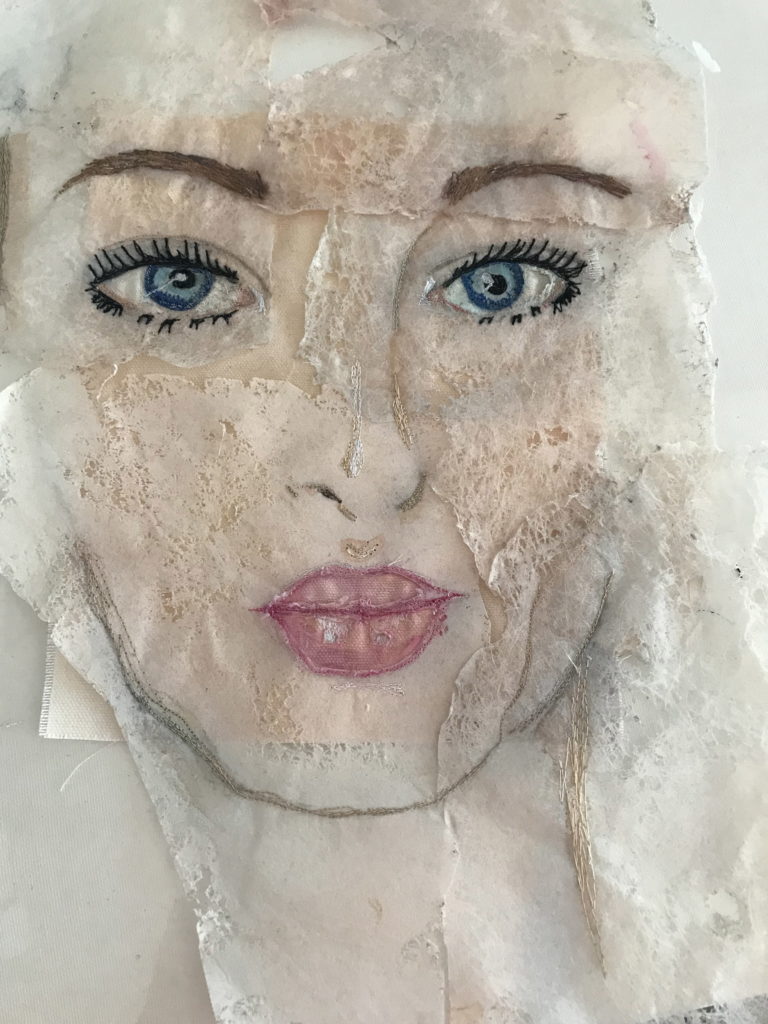
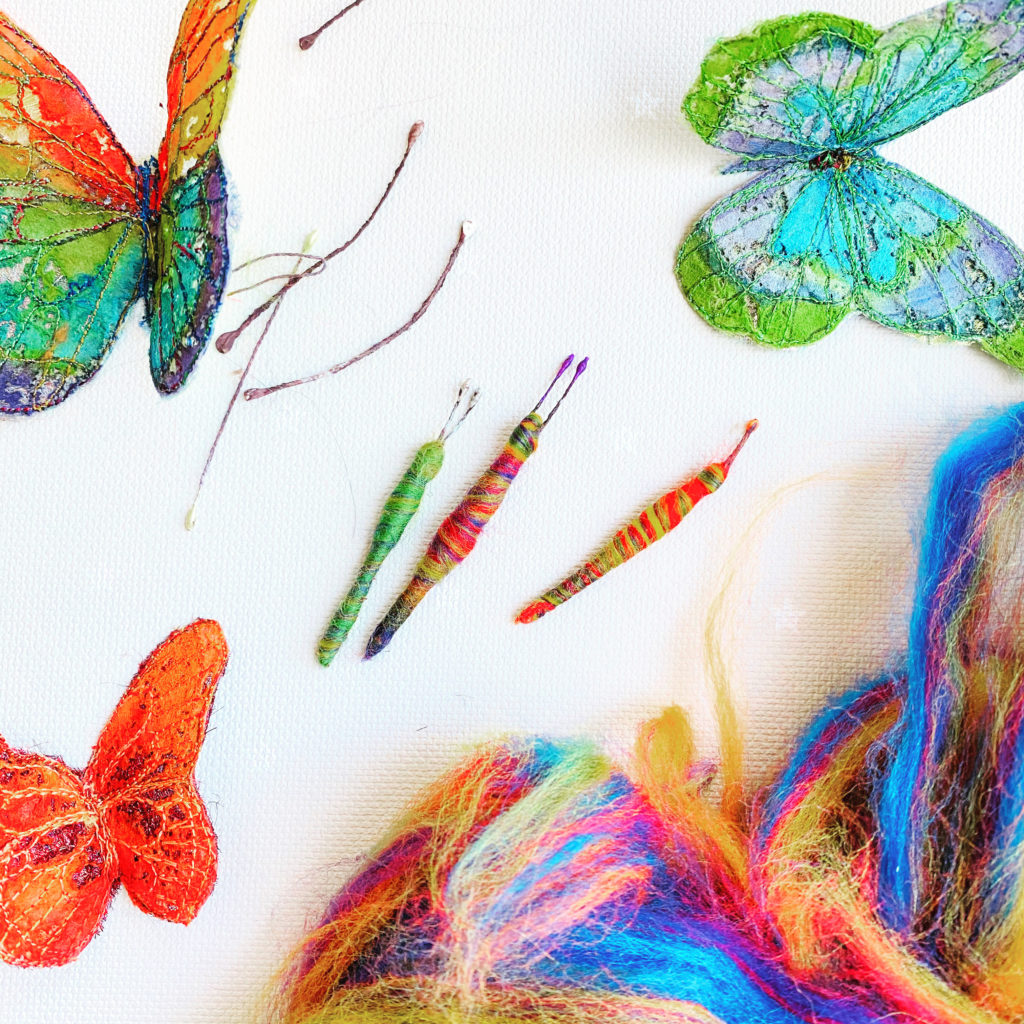
I LOVE lutradur! full of texture when melted and so versatile. Perfect for leaves and flowers and wings! I even did a portrait of my daughter with it!

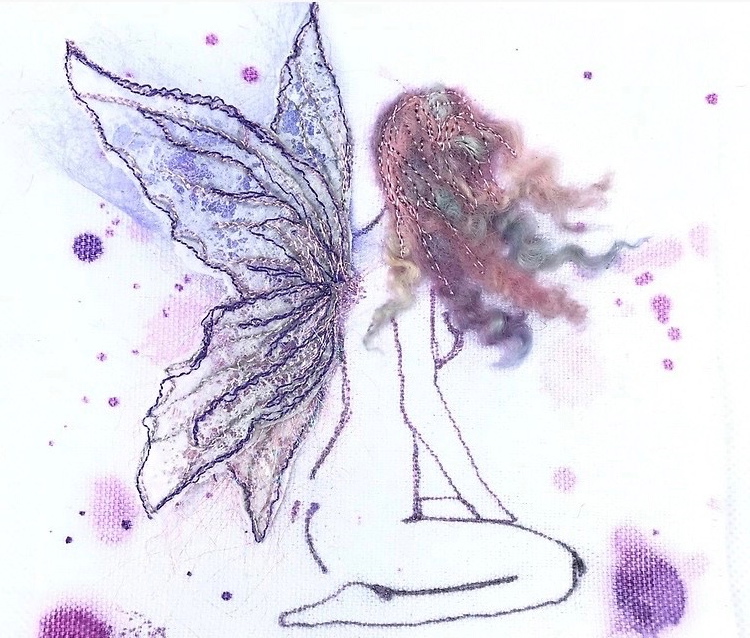
Fairy Tutorial
I did this tutorial last summer for Stitch Magazine – of a fairy with lutradur wings, but the butterfly is made in the same way. I also featured on Kirstie’s Handmade Christmas 2019 Wreath Competition making Christmas foliage in the same way too. My last blog shows a video I made of this process too!

To make the fairy you will need the following (if you are just doing a butterfly you can modify the instructions for the fairy wings and use medium or heavy lutradur)
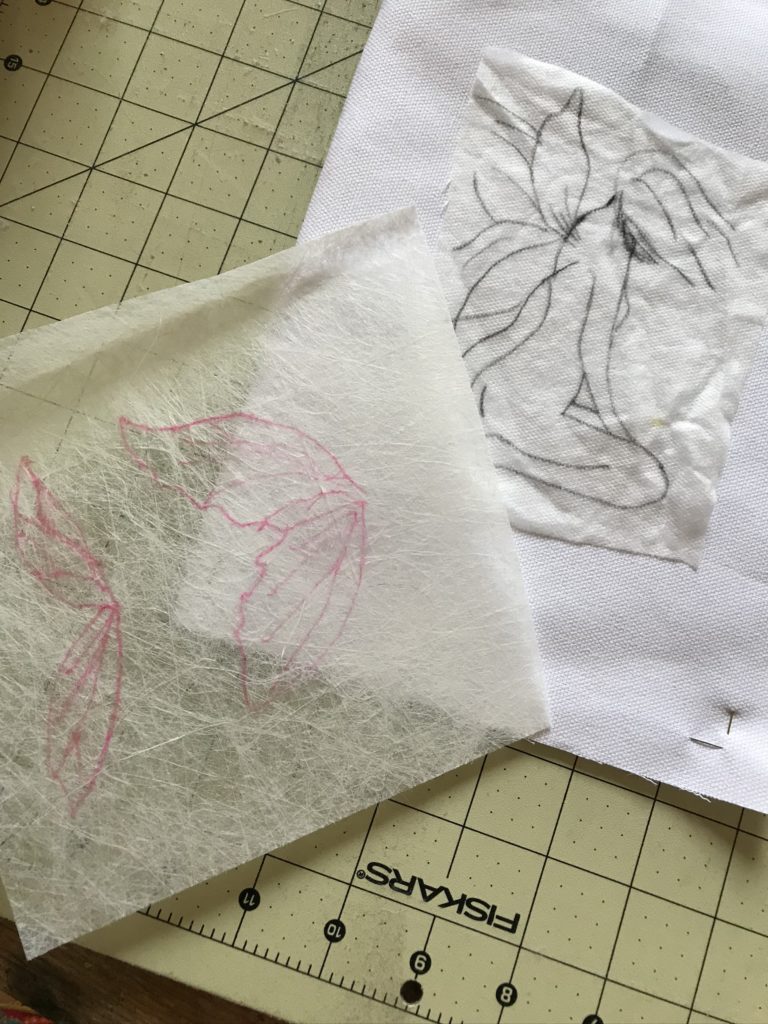
- Water soluble paper (14cm x 12cm)
- Lutradur Medium weight (15cm x 14cm)
- Fusible web (bondaweb) (12cm x 12cm max)
- White medium weight canvas (230gsm) size depends on project. Fairy fits on to 15cm x 15cm piece
- Machine thread – variegated pinks and purples and or pink and purple
- Small amount of heat bondable Angelina fibre (in co-ordinating colour)
- Small amount of curly sheep locks (colour of choice)
- Heat gun
- Sewing machine
- OPTIONAL – inktense inks or similar
Instructions
- Starting with a simple line drawing, trace the fairy (but not the wings) on to water-soluble paper. I find this the easiest way to transfer an image onto fabric but there are lots of other ways! (I cant work out how to upload the PDF for the outlines so please contact and follow me via social media – links below- with your email and I can email it to you)
- Trace enlarged wings (they shrink with heat) on to medium weight lutradur.
- Place the water-soluble paper drawing of the fairy onto the canvas.
- Set up sewing machine for free motion machine embroidery with darning needle drop foot and zero stitch length and dog feed down or covered.
- Stitch the lines of the fairy (but not wings) in variegated thread colour of choice. You can go over the lines twice if desired for a bolder outline
- Cut away the water-soluble paper and sponge wash any remaining paper. Leave to dry
- Use small curly sheep locks (or wool) to shape the hair on the fairy
- Stitch into place using wavy lines (don’t over stitch and leave some strands free. Use a kebab stick or similar to hold locks in place whilst sewing.
- Stich 2 fairy wings outlines on the lutradur (front wing and back wing) using co-ordinating thread. Go over the lines and create a lacy effect. It doesn’t have to be precise. I also do the same again in lighter thread
- Cut out the wings leaving a small border.
- Using a heat gun hold each wing in turn with scissors or similar on a heat proof surface (a tin lid or ceramic tile or plate) and ‘melt’ around the edges and melt holes in to the wings. If you haven’t used lutradur before have a play with a little sample first to see how close to hold the heat gun to get the desired effect.
- Iron on fusible web to the back of the wings and peel off backing paper
- Lay a thin layer of heat bondable Angelina fibres onto the back of the wings on top of the fusible web. Cover with brown paper and briefly iron (it bonds very quickly). The Angelina fibre will adhere to the fusible web and show through the melted holes and around the edges of the wings. If there is too much excess gently tear off
- OPTIONAL: Before sewing on fairly wings add splashes of watered down ink using inktense blocks or similar. I like the imperfect effect this gives. Avoid splashing the fairy!
- Attach wings using free motion machine stitching. Sew the smaller wing first, attaching along the back edge only. Attach the larger wing on top just at the shoulder so that it is able to ‘flap’
1 & 2. trace outlines 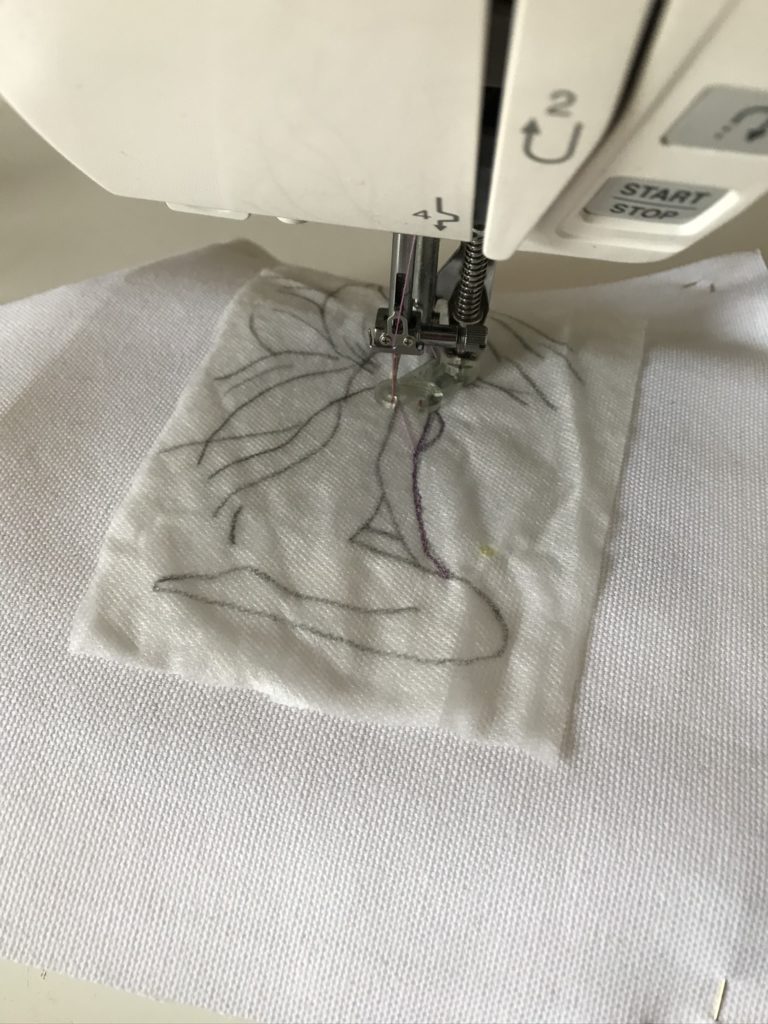
5. stitch fairy 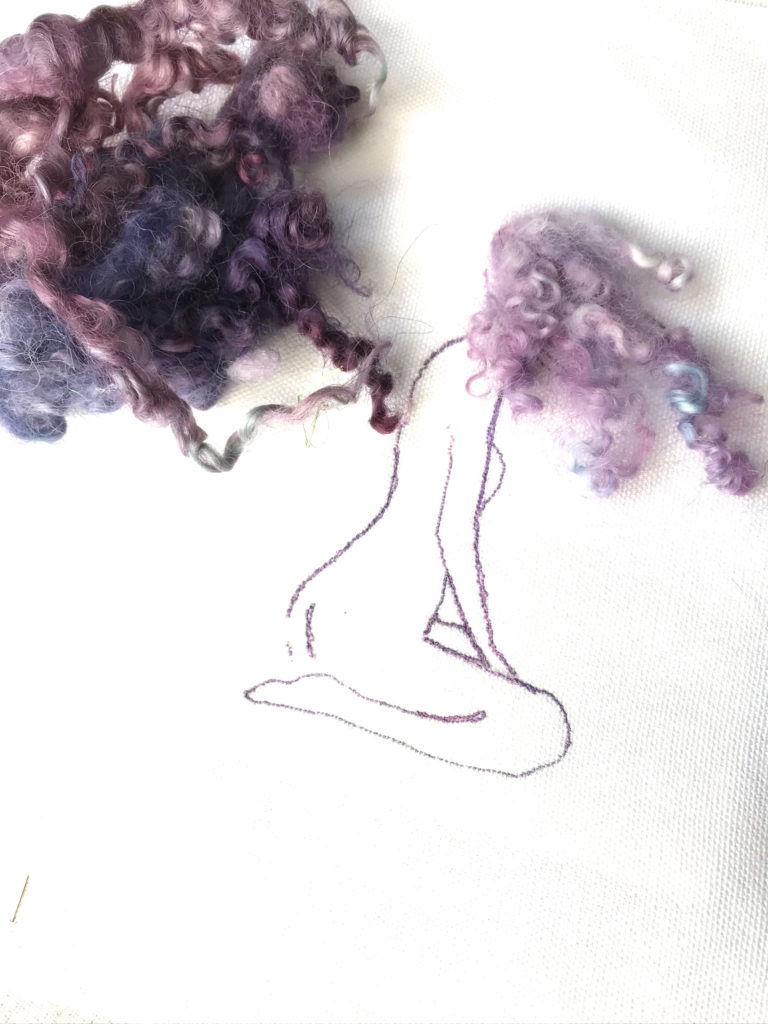
7. use sheep locks or wool for hair 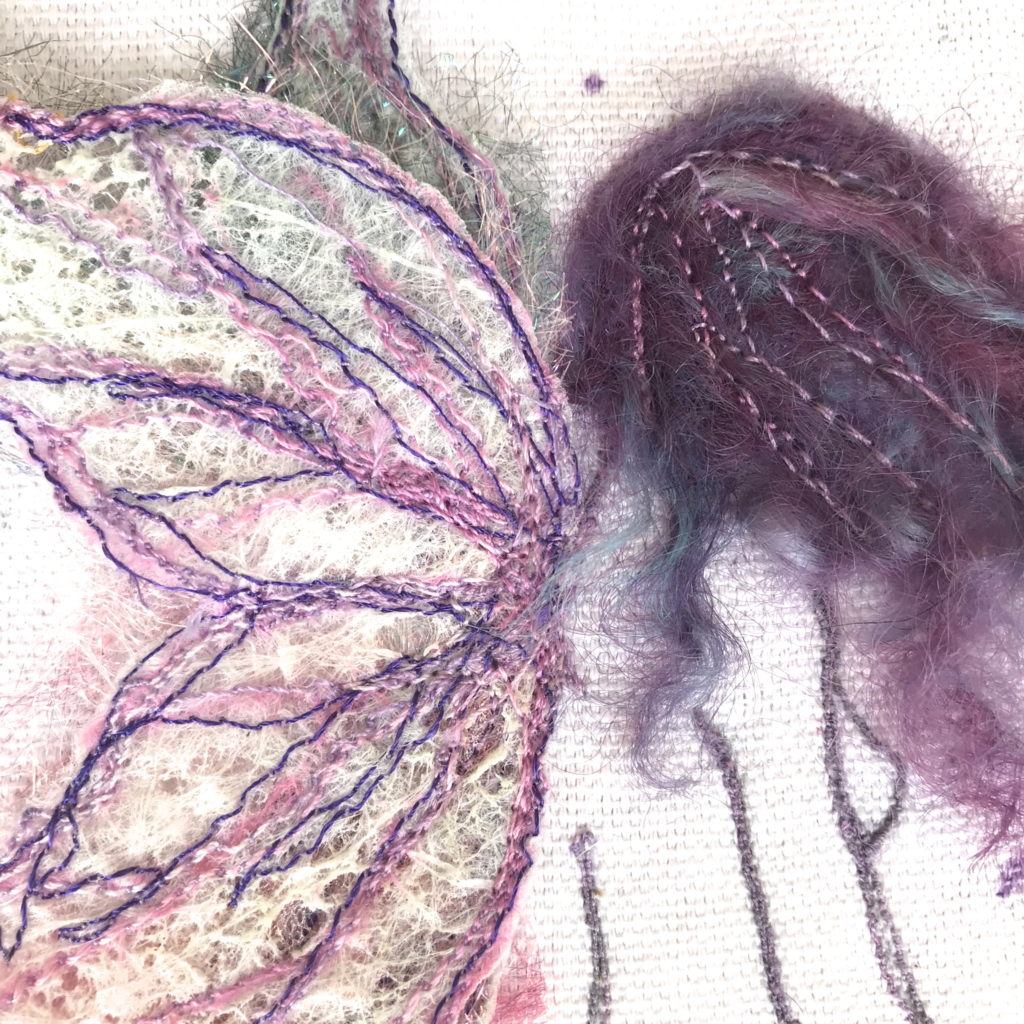
8. stitch hair in place 
11. use a heat gun to melt little holes 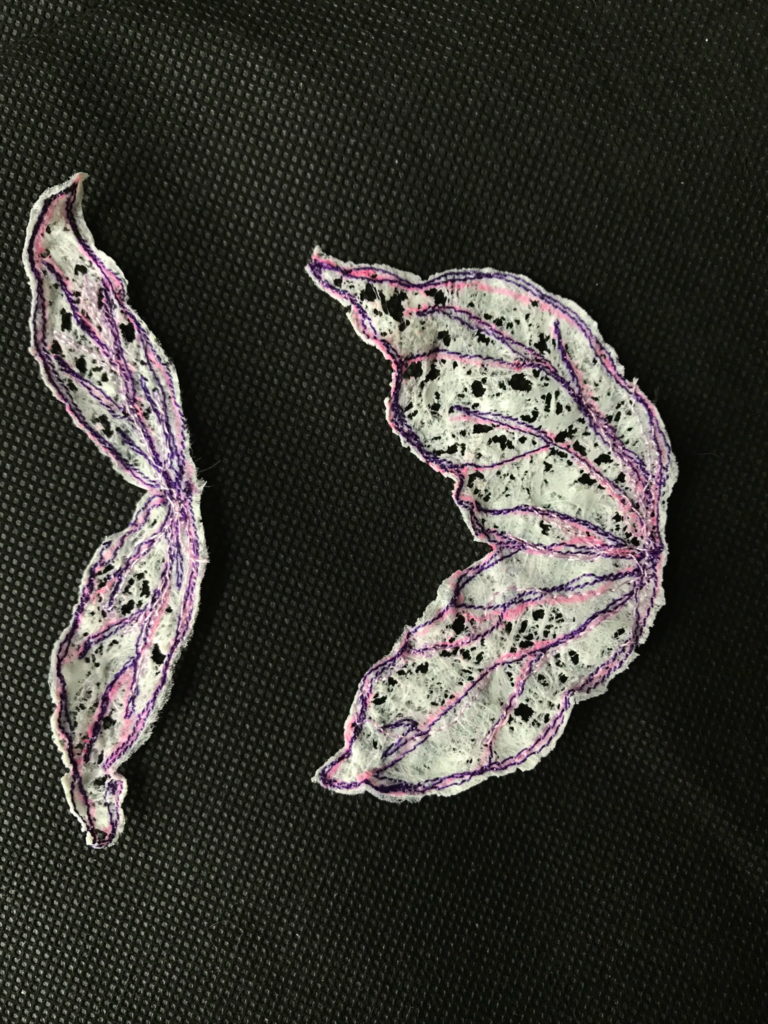
11. melted lutradur 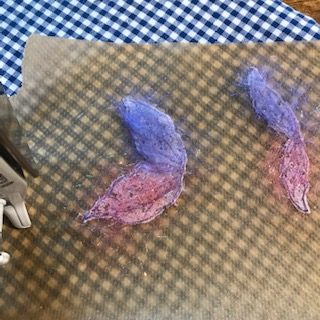
13. adding angelina fibre 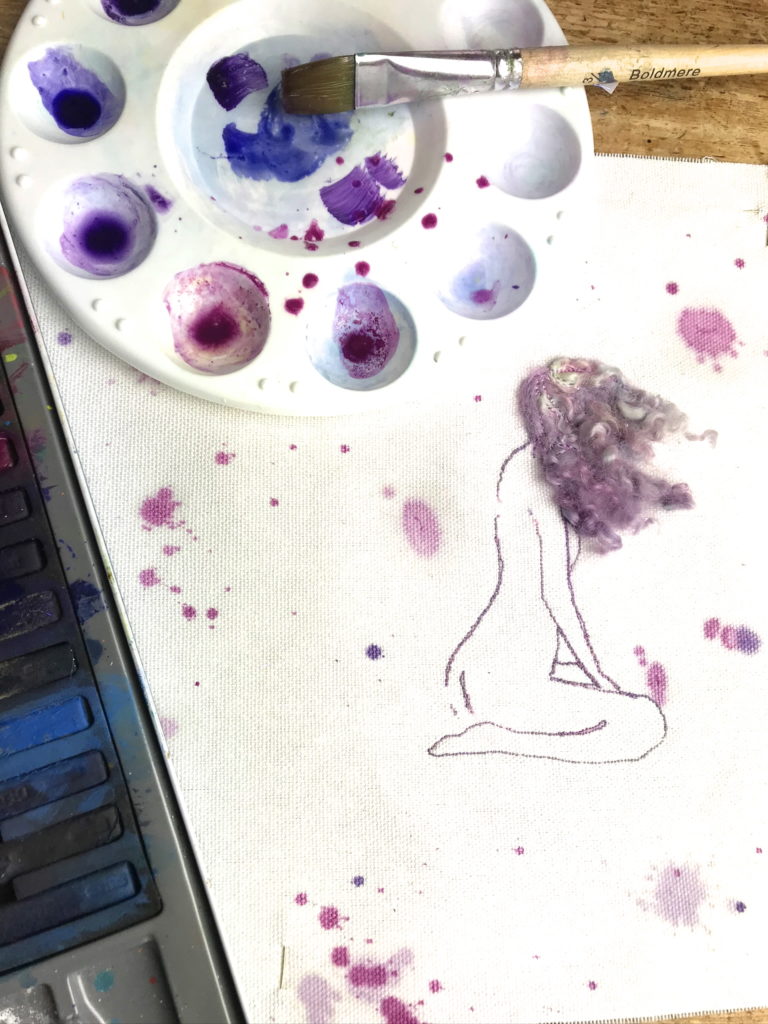
14. making a splash 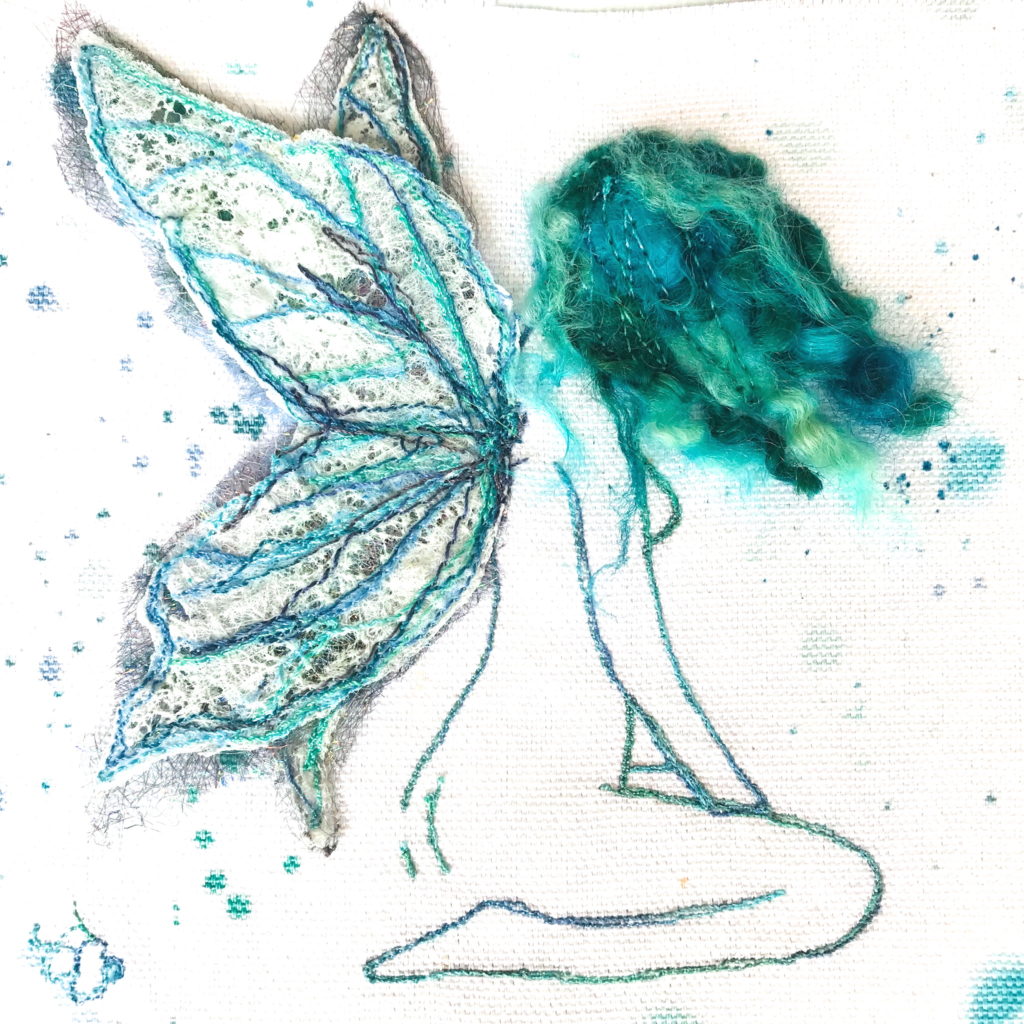
try it in different colours!
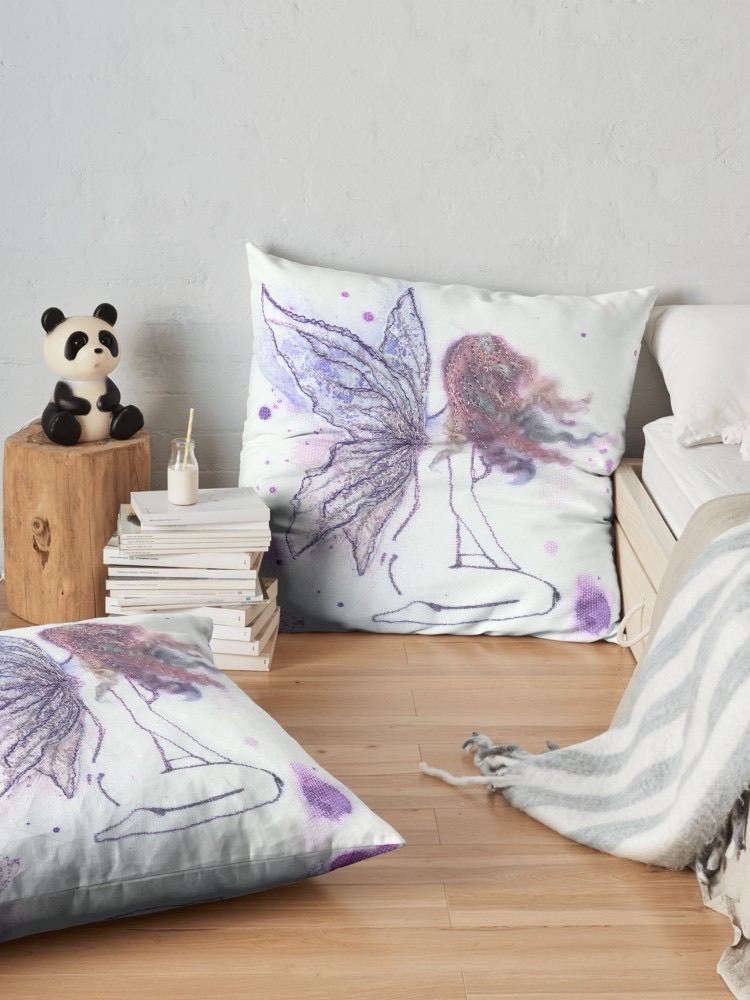
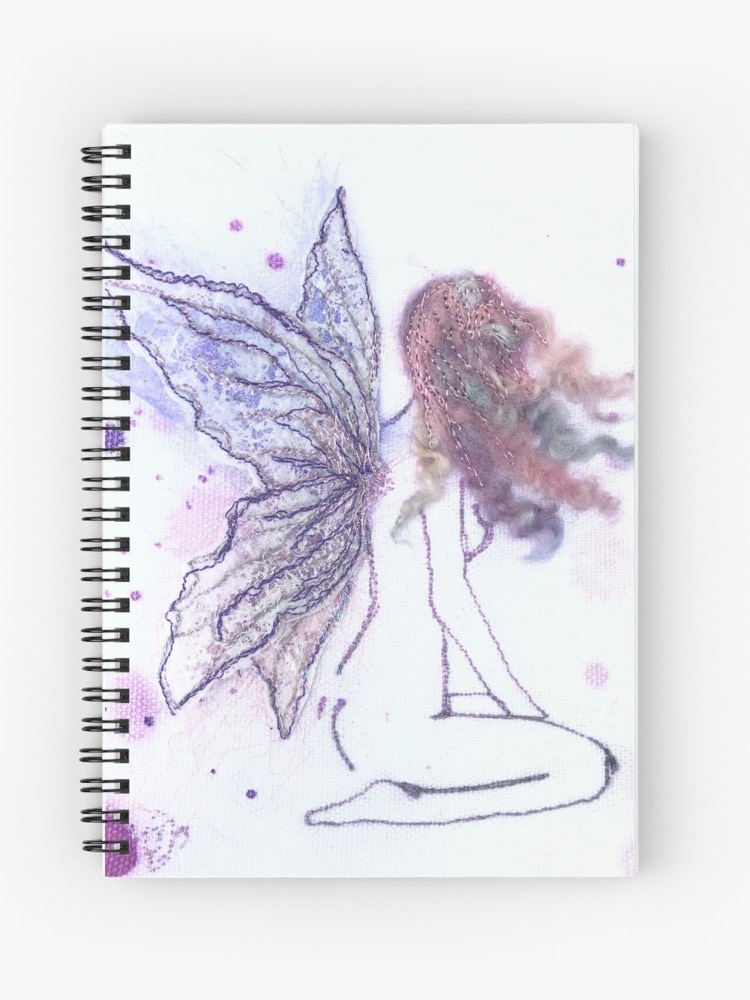
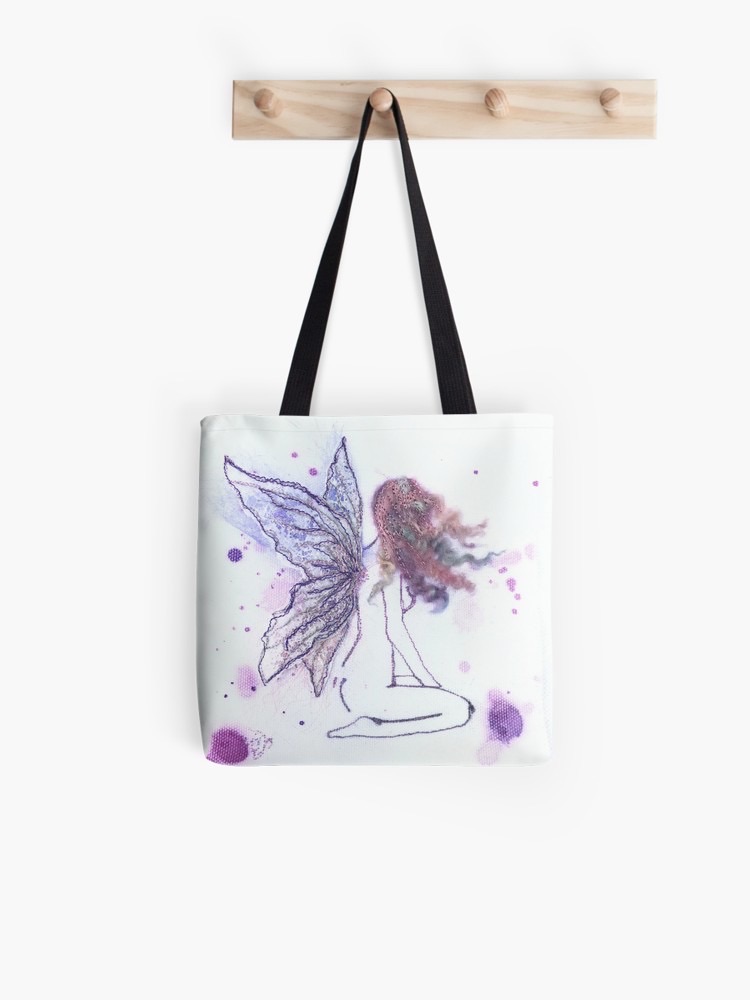
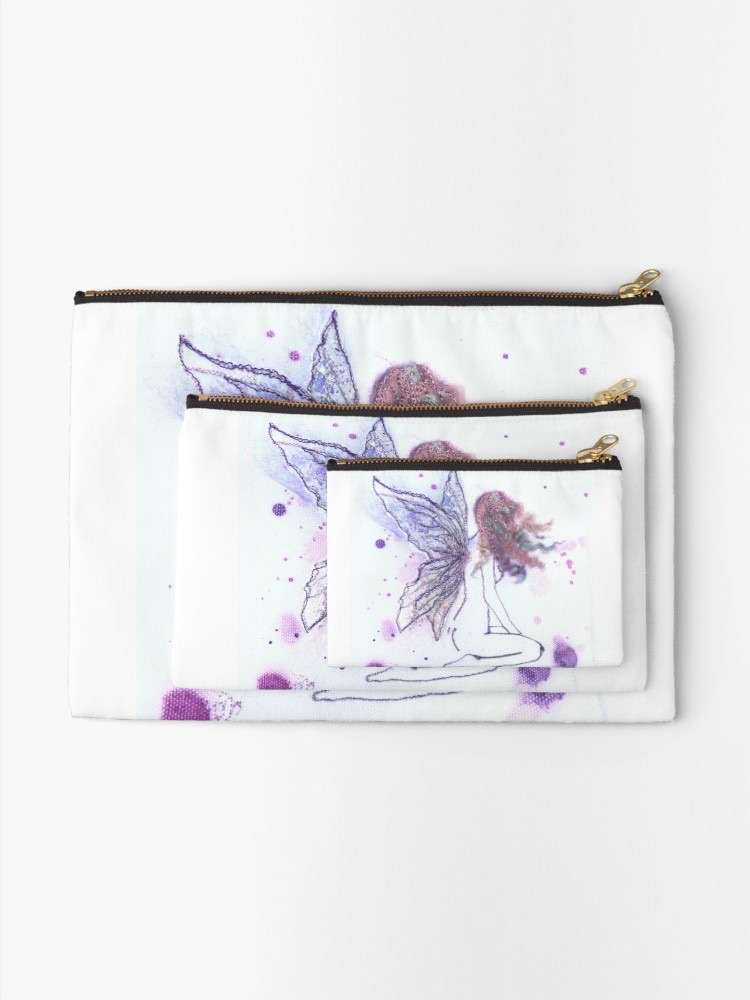
The fairy is complete!
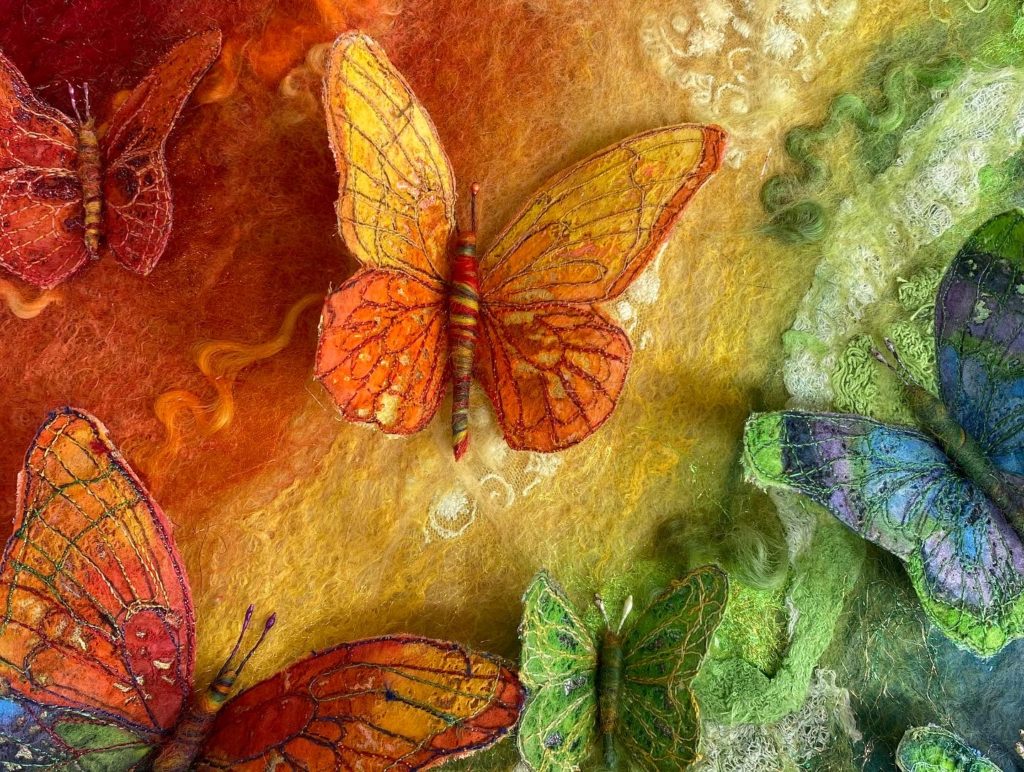
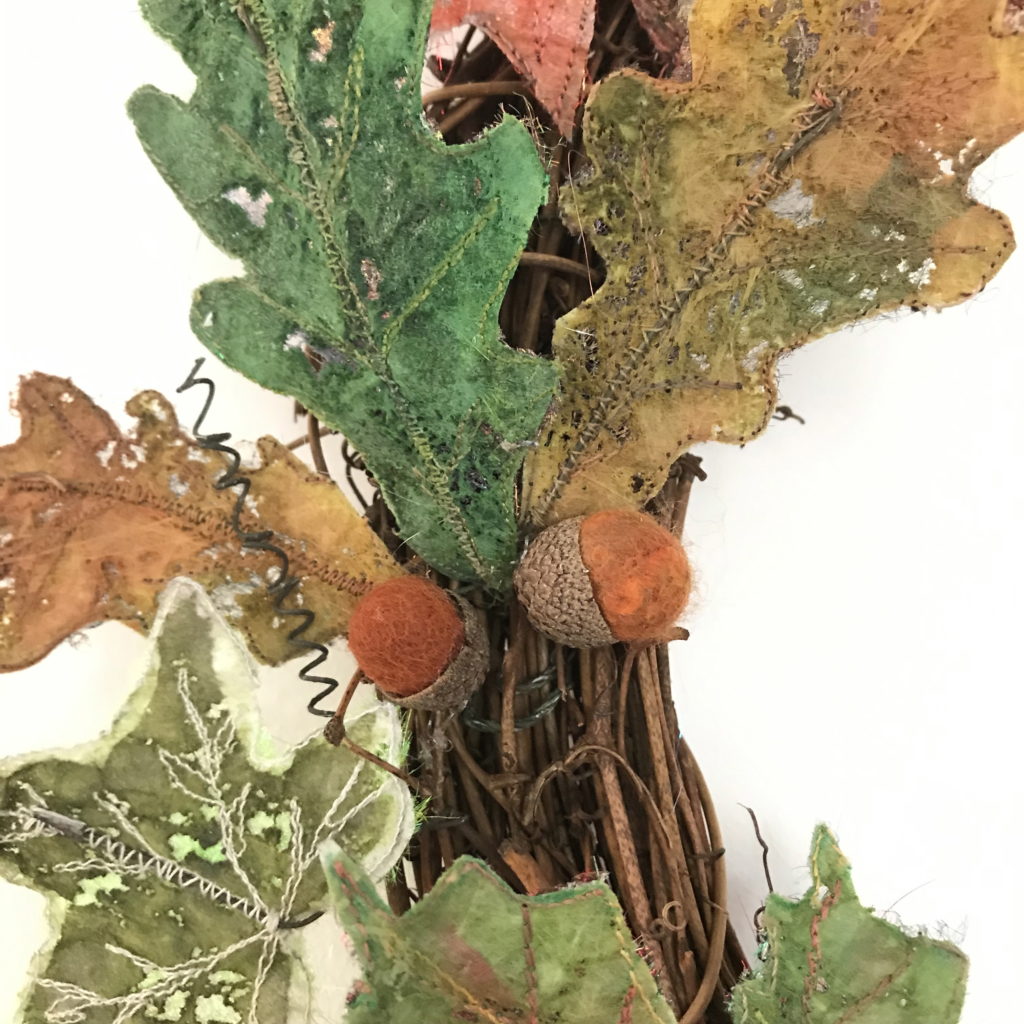
Butterflies and leaves are made in the same way as the wings
Have fun!
If you share what you have made, be sure to credit The Ugly House on social media.
Links below.
Thank you
Please check out and follow/like my social media if you liked this. I’d really appreciate a share and or a follow!
The Ugly House on FB
The Ugly House on Instagram
The Ugly House on Redbubble
The Ugly House shop
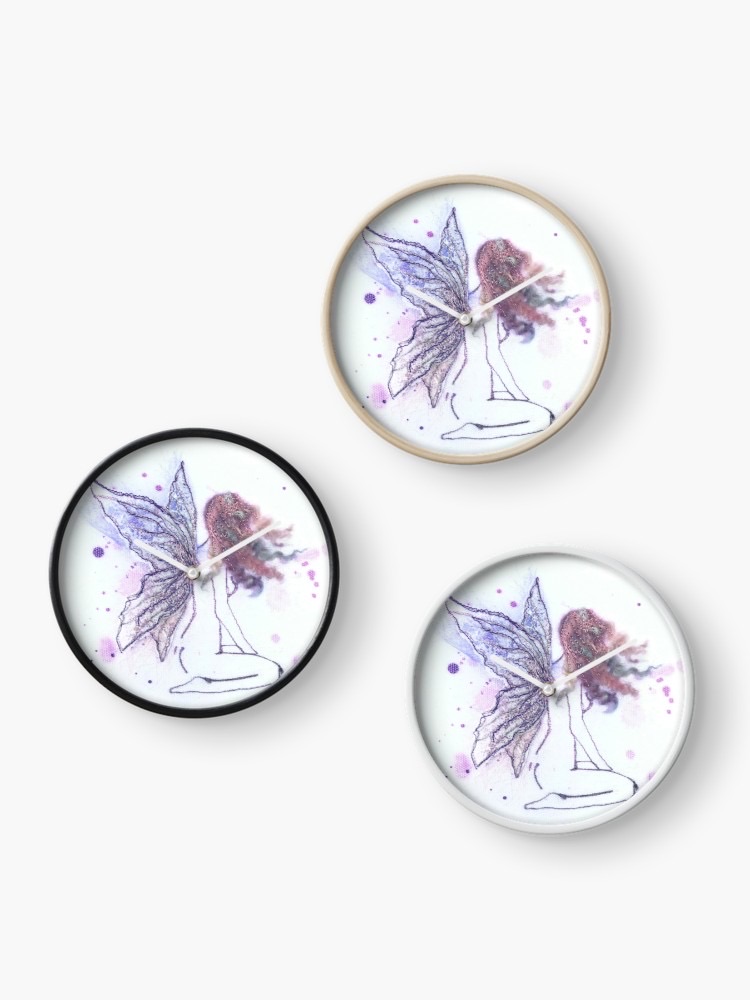
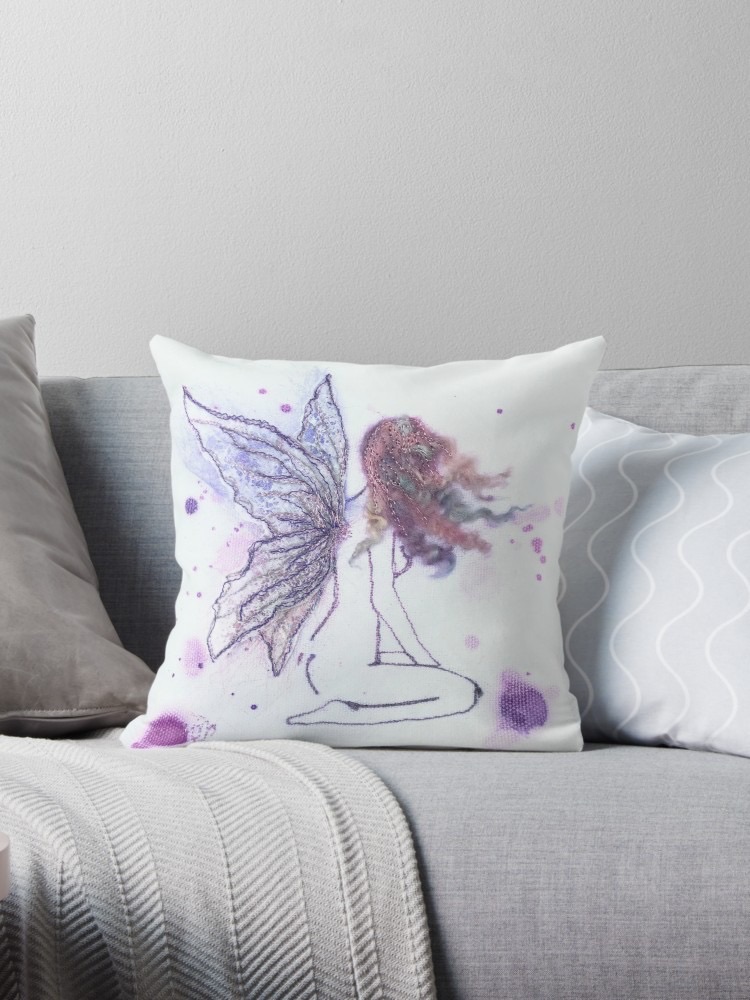
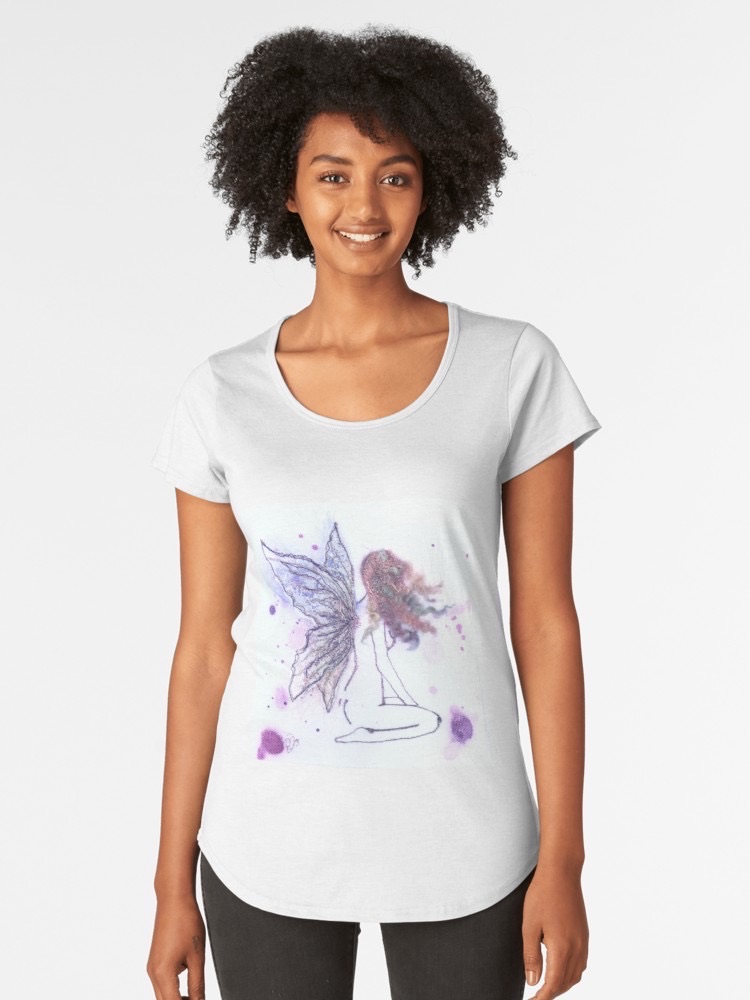
My fairy is available on lots of merch in my Redbubble shop here . I have the T-shirt!
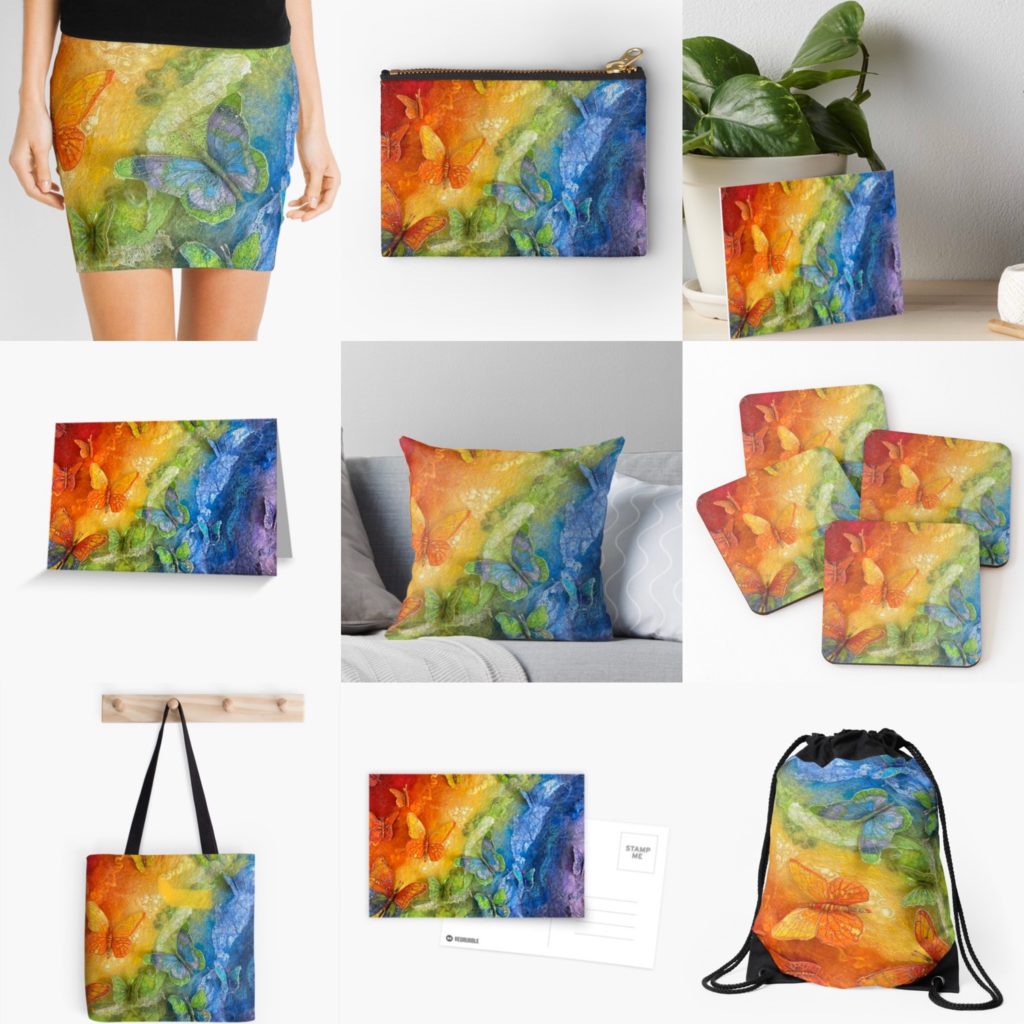
My Rainbows and Butterflies is also available on Redbubble
Thank you so much for doing this tutorial, I assume you had loads of requests for it, not just from me! I would really appreciate it if you could send me the pdf for the fairy, I have a grandaughter who has just discovered fairies (she is 2) and these would make fabulous art for her bedroom. I’m going to invest in some water soluble paper, lutrador and bondaweb and have great fun playing with it. Thank you again xx
Hi, I’ve emailed the template to you. Any questions, please just ask. Looking forward to seeing what you make. Have fun